In today’s data-driven world you NEED to have a firm grip on your website’s analytics if you want to be successful.
Shopify gives you some reports but they are very basic. You need to understand where your visitors are coming from, what pages they are looking at. You need to know where they are leaving your website, and how their browsing experience is.
Think of it this way: if you ran a brick-n-mortar store you could watch your customers shop and ask them for feedback. Online, you need to work with numbers and analytics.
An essential tool for your activity will be Google Analytics. Together with Google Merchant and Google Ads, you will be able to record and use your visitors’ data.
The following guide will help you to:
– Create a Google Analytics account
– Connect the service to your Shopify store
CREATE A GOOGLE ANALYTICS ACCOUNT
Go to https://marketingplatform.google.com/about/analytics/ and sign in using your Gmail address. Then click the Get Started Today button.
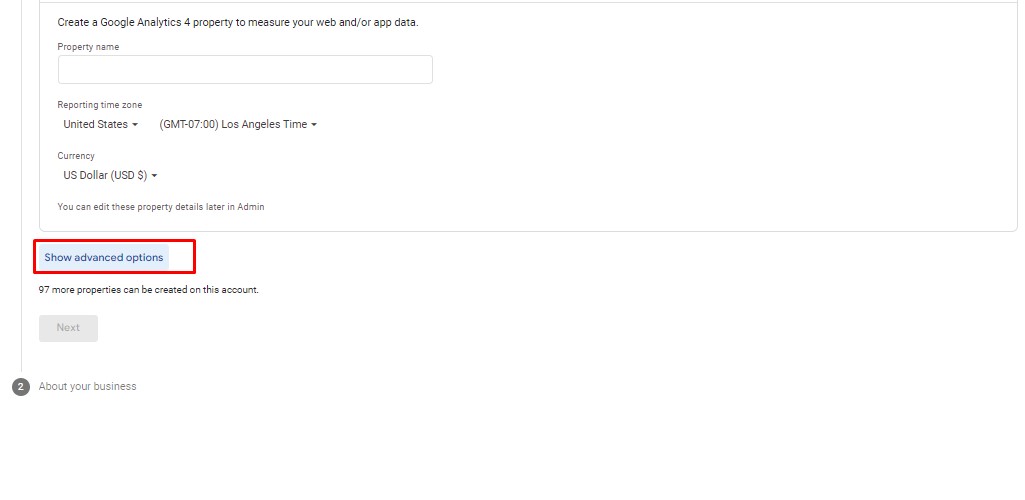
- Add your Business Name
- Select the correct time zone, currency
- Click on “Show advanced options”

- Enable the Universal Analytics
- Add the website URL and make sure to create both Universal Analytics and the Google Analytics 4 accounts

After creating the account:
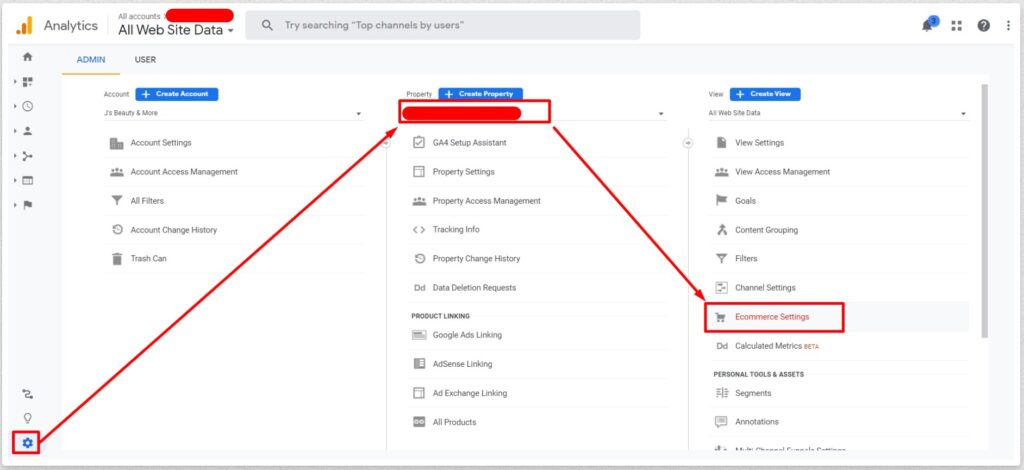
– Go to Admin, select the Property and click on Ecommerce Settings
Enable Ecommerce and Enable Enhanced Ecommerce Reporting

The final step is to copy the UA-XXXXXXXXX-Y property code to Shopify/Online Store / Preferences,,
Remember that Google Analytics won’t do anything to make your store more profitable on its own. You need to review your data and work to improve your conversion rate, decrease your bounce rate, optimize your landing and exit page, and more.
If you followed this guide and were still unable to set it up reach out – we will create the account and hook it up for you!
Related Article
If you don’t have your Business Manager set up completely please follow the below, step-by-step guide. How to Get Your Facebook Commerce Manager Eligible and Approved for Shopping


Trackbacks/Pingbacks